

✅ Key Point: #
To update the time, you adjust it through the base station’s web interface.
🛠 Step-by-Step Instructions: #
- Determine Base Station IP Address
- Use Advanced IP scanner or check the registrations page to get the local IPv4.
- You can also check the IP via the handset:
- Press MENU, followed by a sequence like
####*. - Navigate to BS IP Address.
- Press MENU, followed by a sequence like
- Log Into the Web UI
- Open your web browser and enter the base station’s IP (e.g.,
http://192.168.1.156). - Login using default credentials:
Username: admin Password: admin
- Open your web browser and enter the base station’s IP (e.g.,
- Navigate to Time Settings
- From the left menu, select Tools → Time
- Here, you can choose to:
- Sync with an NTP server, or
- Sync with PC’s internal clock manually.
- It’s best to select Synchronize with the NTP Srver✅
- Set Your Timezone
- Choose the correct Time Zone from the dropdown.
- Enter an NTP server IP or hostname if needed, or rely on the default.
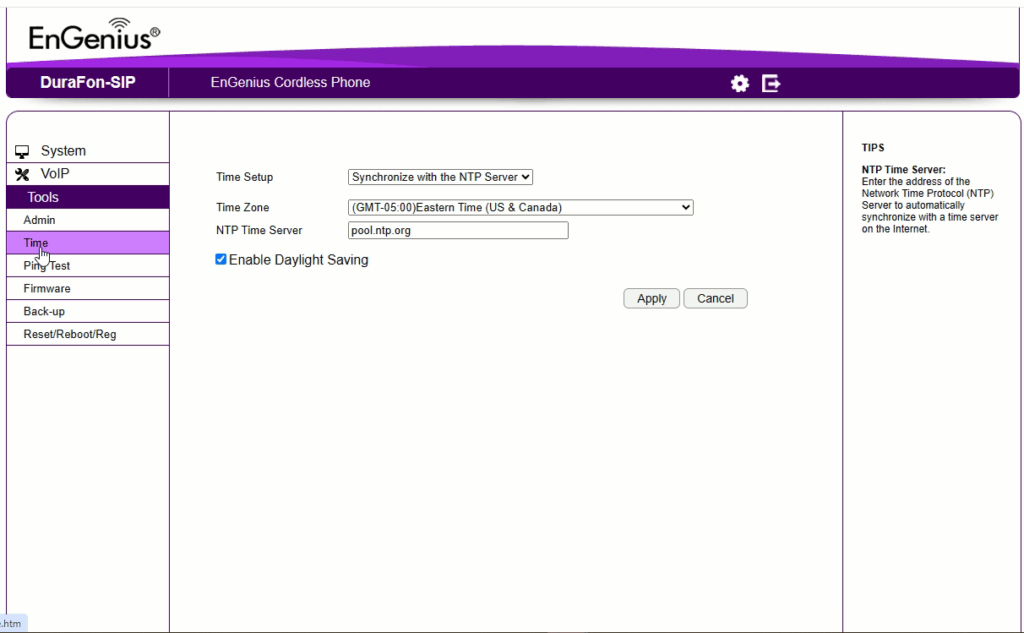
- Apply and Confirm
- Click Apply (or Save).
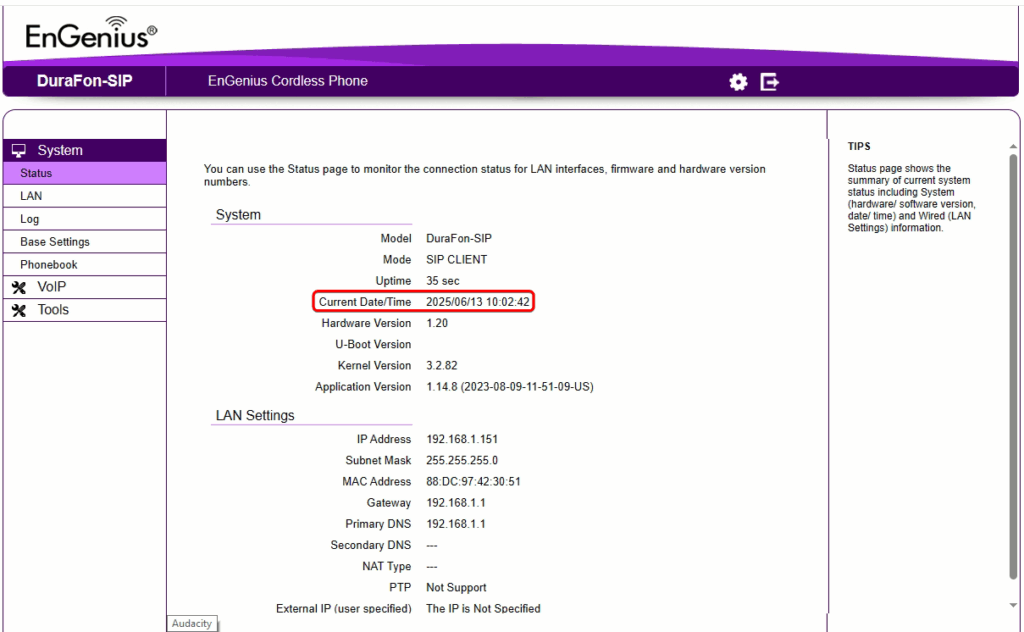
- Verify that the handset displays the updated date/time in its call log or status screens.
- Reboot the Base
📋 Quick Workflow Summary: #
| Step | Action |
|---|---|
| 1 | Find base IP (Using an IP scaner or via handset) |
| 2 | Log in via browser (admin/admin) |
| 3 | Go to Tools → Time |
| 4 | Choose “Sync with NTP” (Prefffered) or “Sync with PC” |
| 5 | Select timezone; enter NTP if needed |
| 6 | Click Apply and reboot; confirm updated handset timestamps |
📝 Notes & Tips: #
- No option exists to manually set time on the handset itself engeniustech.com+6doctorengenius.engeniustech.com+6hellospoke.com+6hellospoke.com+3engeniustech.com+3engeniustech.com+3bhphotovideo.com+1engeniustech.com+1engeniusworks.com+1bhphotovideo.com+1.
- Use NTP server for automatic, accurate timekeeping.
- Ensure the timezone matches your location onthe status page and handset.
- After changing the timezone or changing from “Sync with PC” to “Sync with NTP”, reboot the base.


